Introduction to Pistol Marksmanship
We realize that not every customer is an experienced shooter with access or budget for training. We always recommend seeking professional instruction, and it is likely that your local range can help you find an instructor.
With that said, we thought it might be helpful to provide a very basic overview of pistol marksmanship. By the way, some shooters can hold very strong views about marksmanship technique. We realize this section is not for everyone. This is merely our humble attempt to assist those who are new to shooting.
DISCLAIMER: You are solely responsible for the safe use of your pistol. The following section contains generally accepted operation and safety practices for use of a firearm. Use this information at your own risk. Always seek competent professional instruction.
You must learn new techniques using dry fire practice. See Safety post here.
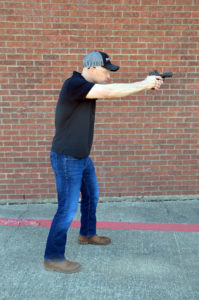
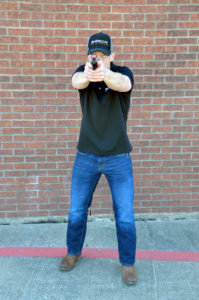
Stance: Accurate shooting and good recoil control begins with a stable foundation. There are several techniques out there, but a good start is a modified weaver stance. Key points of performance:
- Weak-side leg is advanced slightly forward of the strong-side leg.
- Feet are placed approximately shoulder width apart
- Chest is generally square to the target
- Weight is balanced forward on the lead foot (about 60/40 distribution). Distributing your weight slightly forward helps control recoil.
- Extend your arms straight toward the target. Some people lock out the elbows, but most find the elbows should be slightly bent.
- Orient your head upright and square to the target. Shooters who are cross-eye dominant may find that they tilt their head.
- Some people describe this stance as feeling like you were walking along and suddenly stopped mid-stride with your weak-side leg forward.
Grip: Proper grip technique is the heart of controlling recoil. The Shadow Systems Pistol has been carefully contoured and textured to minimize muzzle flip during recoil and maximize your control of the pistol. Key points of performance:
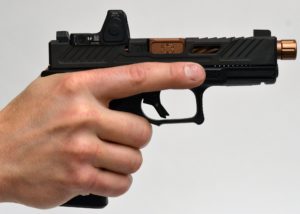
- Firing hand (dominant hand):
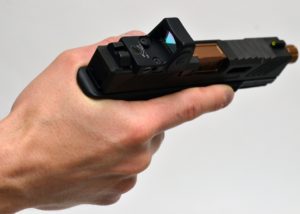
- Your firing hand should be placed as high as possible on the pistol. There should be no light between the underside of the beavertail and the web of your firing hand. This minimizes the leverage the pistol has on your hand during recoil (reduces muzzle flip)
- Unless your muzzle is pointed at the target, your trigger finger should feel for and rest on the textured index pad on the side of the frame (finger off the trigger).
- Your thumb lays naturally along the opposite side of the frame.
- Non-firing hand (support hand):
- Your non-firing hand should wrap around the fingers of your firing hand. Avoid the “cup and saucer” technique of using the firing hand to grab the bottom of the firing hand from below. While common, this
-
- Your palm should fill the open space on the grip panel and be in contact with the texture
- Your index finger should be in contact with the underside of the trigger guard
- There are many variations on thumb placement. A good place to start is with the thumbs oriented forward toward the target. The firing hand thumb can rest on the base of the non-firing hand thumb.
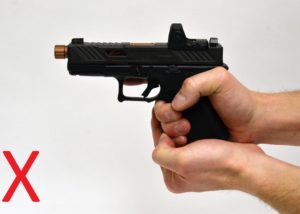
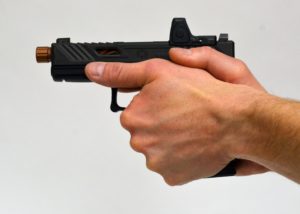
- Grip Pressure: There is no need to “death grip” the pistol. In general, you should be squeezing harder with your support hand than your firing hand as excessive tension in your firing hand can cause “trigger freeze” when firing rapidly. Also, the pressure from your support hand effectively transfers to your firing hand fingers which are in contact with the grip surface. A good rule of thumb is 60/40 firing hand to non-firing hand pressure.
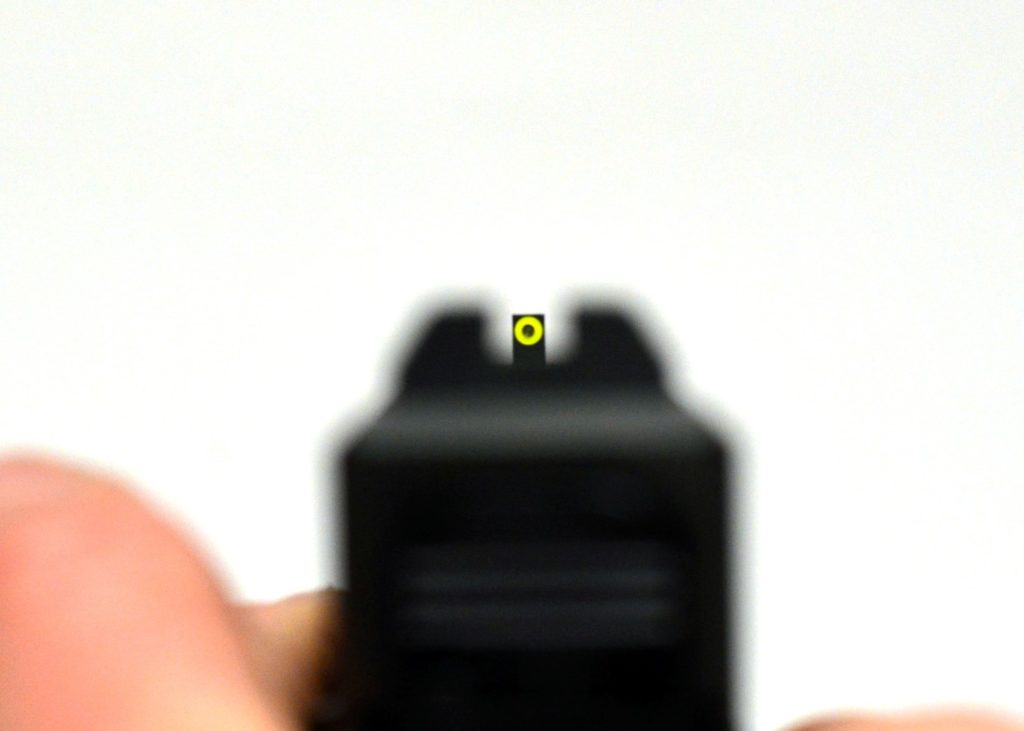
Sight Alignment:Consistent sight picture when combined with proper trigger manipulation is what allows you to hit your target.
- Iron Sights:
- Your eye is only able to focus in one plane at a time. Getting good at shooting with iron sights starts with accepting that it is physically impossible to have the rear sight, front sight, and target in focus at the same time.
- The generally accepted practice is to FOCUS ON THE FRONT SIGHT. This does mean the target will appear a bit blurry. This is something all shooters contend with. A blurry target will have less impact on your accuracy and precision than a blurry front sight. Obviously, all of this assumes that you have focused on the target enough to properly identify it before shifting your focus to the front sight when firing the shot.
- Therefore, a typical sight picture will feature a slightly blurry rear sight, a crisp clear front sight that is symmetrically placed in the rear sight notch, and a slightly blurry target.
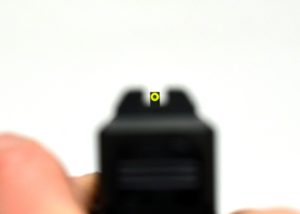
- Electronic Dot Sights: If you choose to use an electronic dot sight on your pistol, the process of aligning the sight with the target is vastly more simple.
- With dot sights, you keep your focus on the target which allows you to better identify threats, maintain your situational awareness, and transition quickly in a multiple target scenario. Focusing on the target is also more natural under stress.
- The dot does not need to be “centered” in the window for the round to impact the target. If it is off to the side or a bit high in the window, the round will still impact the target where the dot is located. This is another advantage of electronic dot sights—they are very “forgiving” in terms of alignment.
- Therefore, a typical electronic dot sight picture will feature a crisp clear target and a dot that is superimposed on the target where you want the round to strike.
Trigger Control: We will describe basic techniques for physically pulling the trigger, but the most important (and difficult) pitfall for new shooters to avoid is what is commonly called “flinch.”
- Finger Placement: The dimensions of your hand strongly impact where your finger falls on the trigger. The important thing is to ensure you are able to pull the trigger to the rear in a controlled fashion without disturbing your aim. Some very competent shooters use only the pad of the finger while others seemingly jam their whole finger in the trigger guard. Find what feels best for you during dry fire.
- Flinch: Flinch is a very common tendency to anticipate the noise and sensation of recoil and “jerk” the trigger or dip the muzzle downward as the shot is being fired.
- This normally manifests as a shot group that is low and to the right for right handed shooters and low and to the left for left handed shooters.
- The problem with flinch is that recoil masks the jerking movement and the problem can remain hidden.
- If you have ever seen someone hit a dud or dummy round at the range, you will often see them dip the muzzle downward at the moment they expect recoil to occur. This is a great illustration of how drastically flinch can affect accuracy.
- Note: elite shooters will sometimes exhibit a “post-ignition flinch.” They are also anticipating recoil and moving the pistol downward. However, the difference is that their response is so finely tuned that they are doing this AFTER the shot breaks. Again, this is the territory of very elite shooters, and only some of them. Your goal should be zero movement of the gun during and after firing.
- The best way to avoid or eliminate flinch is with dry fire practice—lots of it. Randomly adding some dummy rounds to your magazines during live fire training can also help reveal and correct flinch.
Final Thoughts: One final reminder to never lose sight of safety as you learn pistol marksmanship. Practice the fundamentals, seek the help of competent instructors, dry fire as much as you can, and you will progress rapidly.


